Dual booting Ubuntu and Windows is Easy!!
Linux is a very powerful and versatile operating system that can boost your productivity. Whether you are a student or a professional, you can benefit from running Linux on your PC. Dual booting allows you to have two operating systems on the same machine and switch between them whenever you want. In this blog, I will show you the entire procedure to dual boot Linux and Windows on your PC safely.
 |
|---|
| Dual boot Ubuntu and Windows 11 |
System Requirements
Even before we start, you need to make sure your machine meets the following prerequisites.
-
CPU: 2 GHz dual-core processor
-
Memory: 4 GB of RAM
-
Make sure that your BIOS Mode is UEFI.
How to check: Type System Information in Windows Search box and check whether your BIOS mode is UEFI or not. -
Hard disk space of at least 25 GB(I would recommend 80+ GB)
-
A USB pen-drive of at least 8 GB storage space
-
Lot’s of time. (This is important as you can mess up if you don’t do the installation carefully!!)
Warning: Do the dual boot installation at your own risk and I will not be responsible for any problems like data loss, etc. which you might face during the installation. (I will try my best to help you though🙂)
Disable Fast Startup
Follow the series of actions given below —
Control Panel » System and Security » Power Options » Choose what the power buttons do » Untick Turn on Fast Startup (Note: If the option is greyed out then you may need to click “Change settings that are currently unavailable”) » Save Changes
Disable Secure Boot
Restart your computer and press F2 Key (Key depends on your computer Manufacturer) while the computer is rebooting to enter the BIOS. Disable Secure boot and save the changes. You should be able to successfully boot into Windows 11.
Disable BitLocker
BitLocker may give you some trouble while dual booting and thus I recommend to turn it off, though it is not mandatory to do so. (Very important Note: If you are not disabling BitLocker then make sure that you note down your BitLocker key from your Microsoft account as you will be asked to enter it later in the installation.)
Procedure: Settings » Privacy & Security » Device Encryption » Toggle to turn it off.
Disable Intel RST
Intel RST (Rapid Storage Technology) may not be active on all computers in the world but some computers do have Intel RST (like Dell PCs) and if your computer has it then you will have to turn it off in order to dual boot your system.
Warning: Be extremely careful while doing the following steps as you might lose your data if you make a mistake!!
- Open command Prompt as an administrator and give the following command.
bcdedit/set safeboot minimal
-
Reboot the system pressing the F2 key to open the BIOS menu.
-
Under System Configuration->SATA Operation, you will see “RAID on”. Switch to AHCI mode and ignore the warnings.
-
Click Apply and you will boot into Windows in Safe Mode.
-
Open command Prompt as an administrator and give the following command.
bcdedit/deletevalue safeboot
- Reboot your system and you have successfully switched from RAID to AHCI.
Download the ISO image and burn it on USB
-
We will be installing Ubuntu for this tutorial. Download the ISO image from the official Ubuntu website. I would recommend downloading the latest LTS(Long term support) version.
-
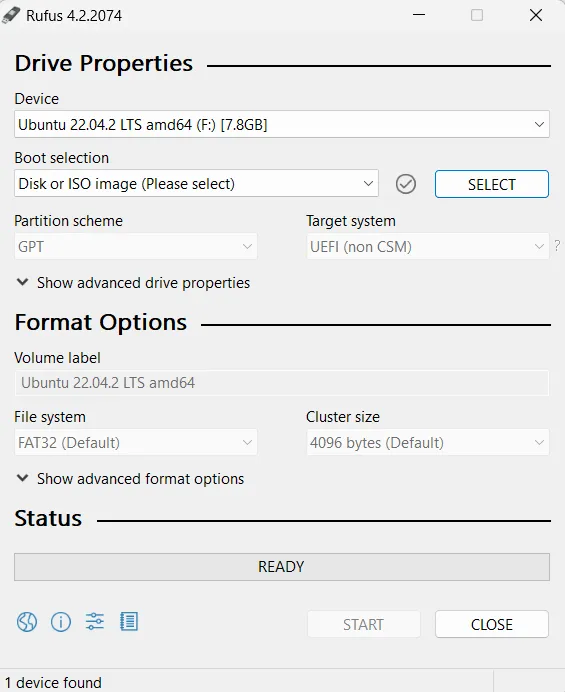
Download Rufus. Connect the USB pen-drive to your computer and run Rufus as an administrator.
 |
|---|
| Rufus Software Settings |
Select the ISO image that you just downloaded in the Boot Selection section and keep everything else as it is (Default settings). Click on Start and go grab some coffee till the ISO image is burnt on the USB !
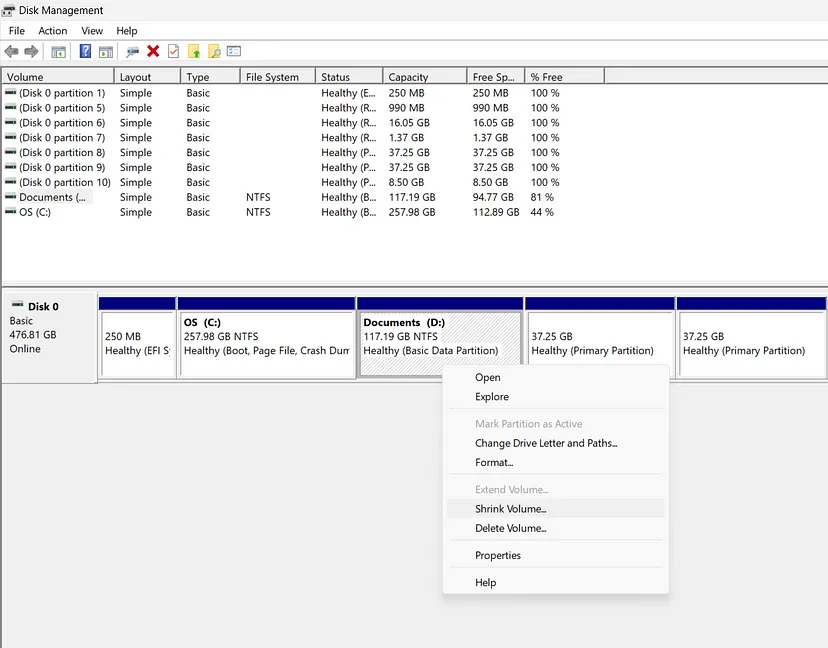
Create a partition to install Ubuntu
- Type “Create and Format Hard Disk Partitions” in the windows search box.
 |
|---|
| Right click on the drive you want to shrink and click on Shrink Volume |
 |
|---|
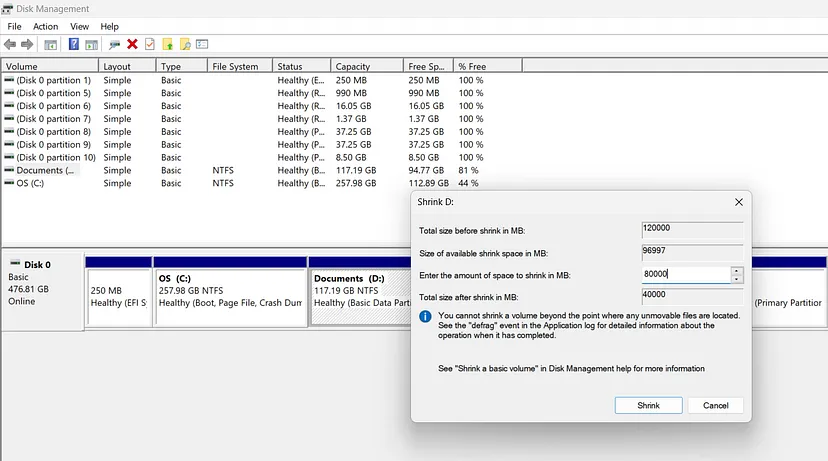
| Enter the amount by which you want to shrink and click on Shrink |
You will see the space that you want to install Ubuntu in as “Unallocated Space”.
Installing Ubuntu alongside Windows
- Make sure that the USB pen-drive is connected and restart the computer. Press the F2 key while booting to enter the BIOS.
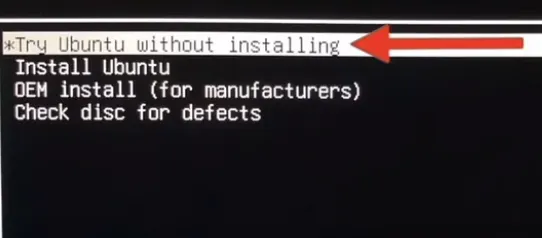 |
|---|
| Navigate to Try Ubuntu without installing and press Enter! |
- Use Ubuntu and see if it work properly, Click on Install Ubuntu to continue with the installation. Here, in what follows I will give the screenshots of only the important steps. You can do the general steps like the language selection, location ,etc. on your own. Also the following screenshots are used from this great YouTube tutorial.
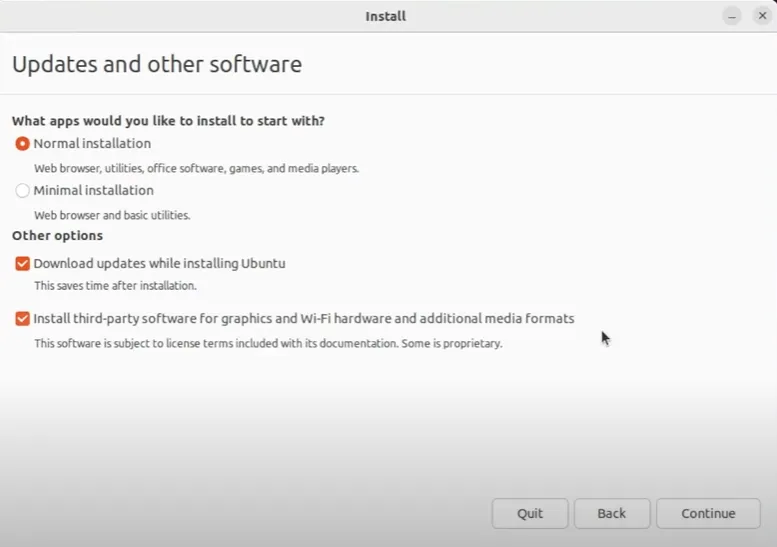 |
|---|
| Select these options and Click on Continue |
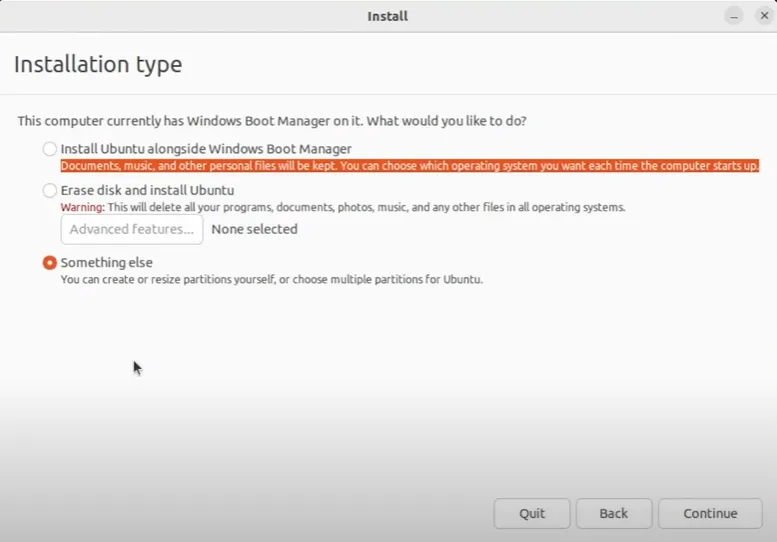 |
|---|
| Select Something else and Click on Continue |
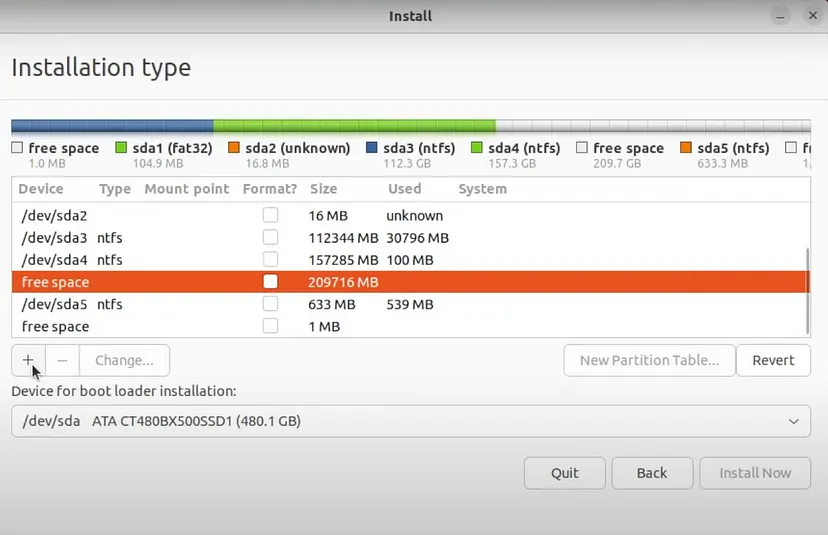 |
|---|
| Select Free space and click on + sign |
In the following 3 screenshots, choose the size of the partition as per your choice.
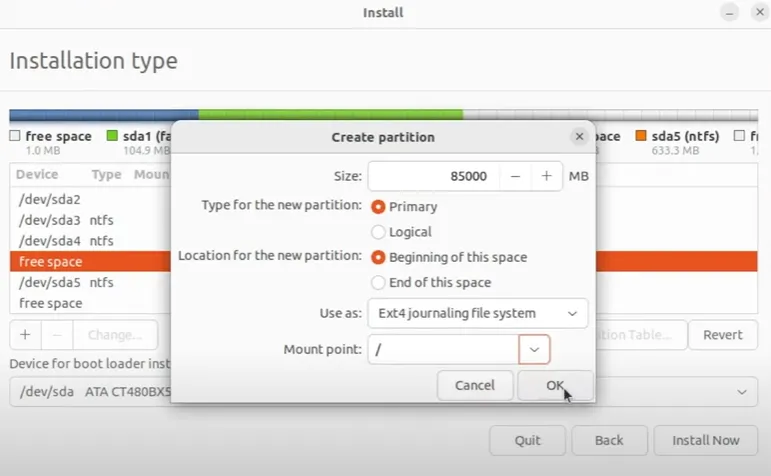 |
|---|
| Do the following settings and click on Ok |
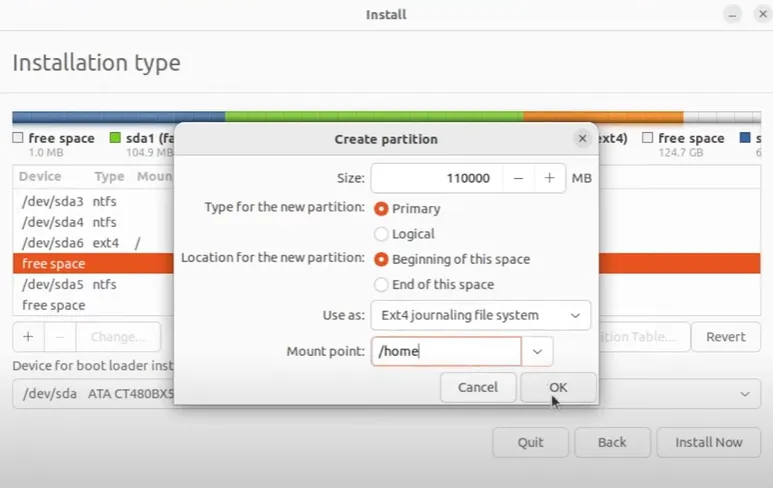 |
|---|
| Again click on + sign, do the shown changes and click on Ok |
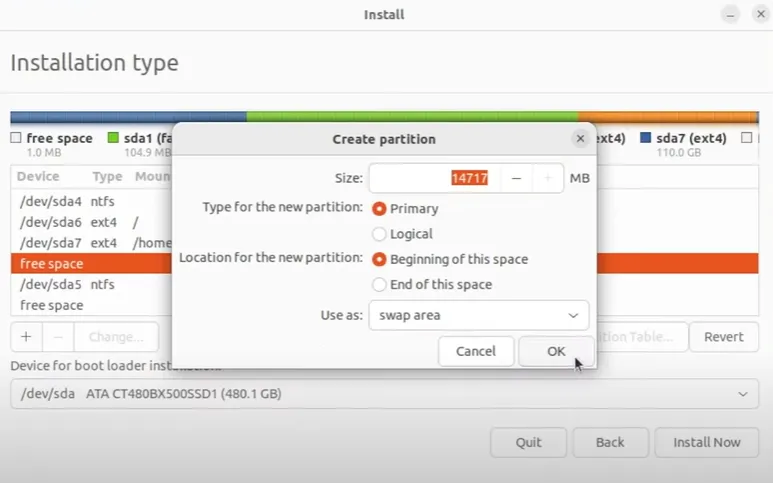 |
|---|
| Again click on + sign, do the shown changes and click on Ok |
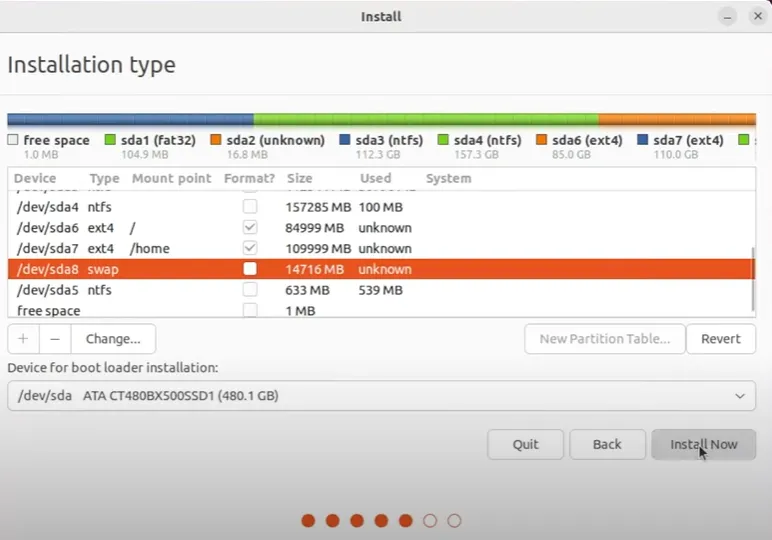 |
|---|
| Click on Install Now |
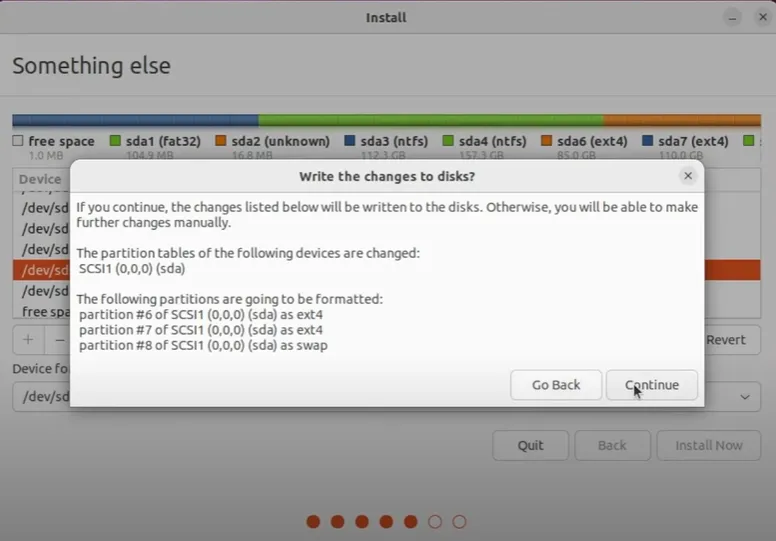 |
|---|
| Click on Continue |
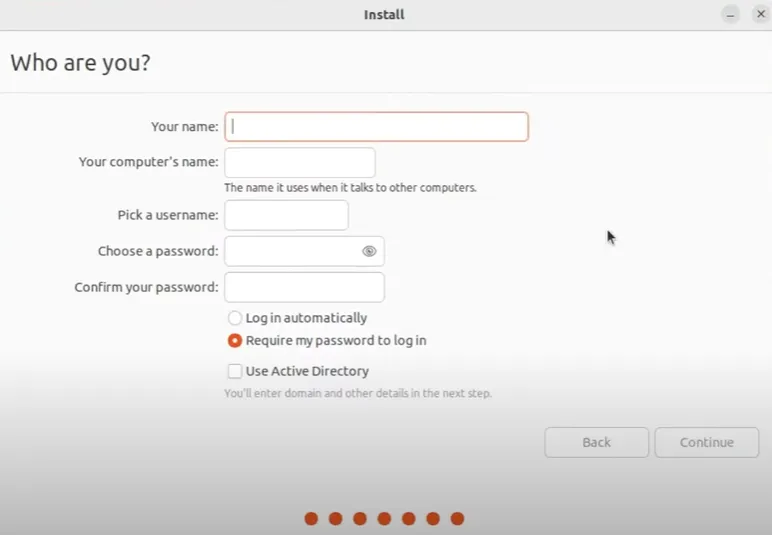 |
|---|
| Create your user account and click on Continue |
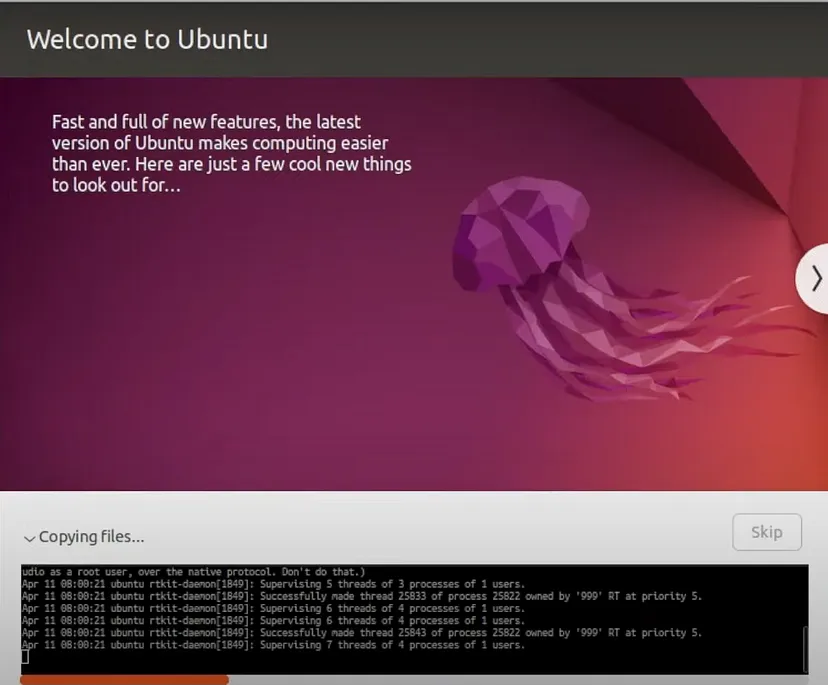 |
|---|
| Enjoy your coffee while Ubuntu is getting installed on your computer |
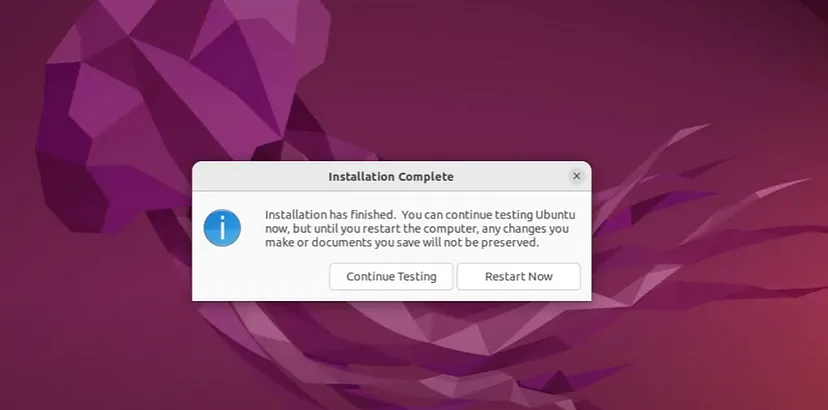 |
|---|
| Click on Restart Now. The installation is complete!! |
Take out the USB pen-drive before your computer starts rebooting and you will be presented by the GRUB menu which will give you the choice to boot into either Ubuntu or Windows.
Congratulations✌️✌️, you have successfully dual booted Ubuntu Linux and Windows. I hope you found this tutorial useful and were able to dual boot seamlessly. You can now customize Ubuntu as per your choice and enjoy the endless benefits of using the Linux OS!!